
The Freelander2 had an option of built-in roof rails, mine didn’t come with them which meant buying roof bars. Sometimes bars are a much better option to a trailer. I actually prefer bars to rails, but they have an obvious downside, storage. Having become sick of falling over them, it was time to fire up the welder and make some roof bar storage.
Designing the perfect storage*
I’ve had a few methods of storing roof bars during my driving career. Thrown in the roof space and buried is quite a common option if a little annoying. Hooking one leg over an edge is a little more accessible but is easily knocked off and takes up a lot of wall space. Ultimately I’ve decided on a stacking arrangement. This gives compact storage, close to the ceiling and out of the way.
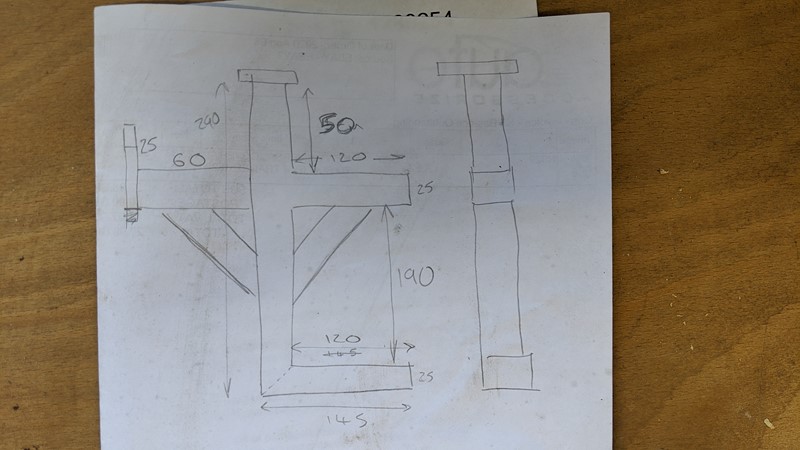
With some basic measurements taken from the roof bars, I could start to draw out a design. With no ‘fag packets’ available I sketched out the solution in my head on to some paper.
*Perfect to the extent its worked well enough for me
Cutting and marking up the parts
I took some 25mm x 3mm box section and used a multi-material mitre saw to quickly cut up sections to match the cutting list. Really, I did make a cutting list, honest.
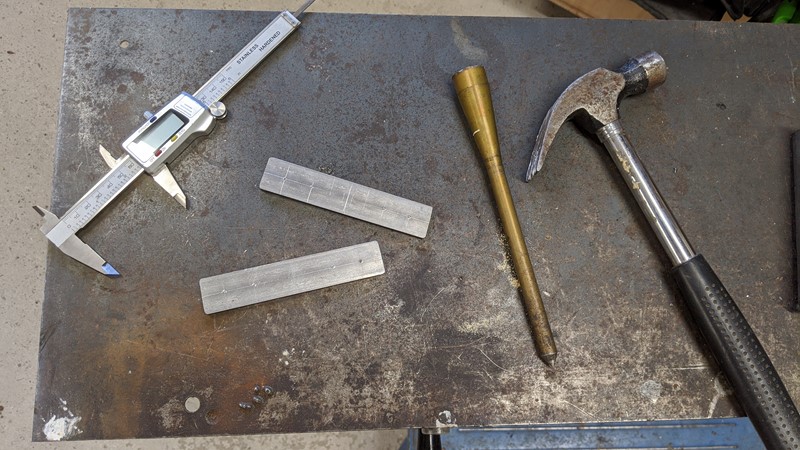
Hammer and punch out, I used the vernier calliper to quickly mark out the location for the holes. These will eventually secure the brackets to the garage ceiling.
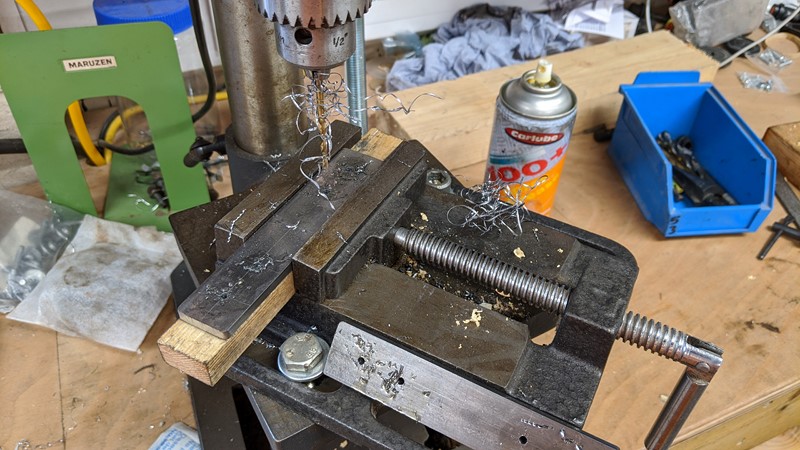
With the super-accurate measurement and punch marks made, I could drill out the holes. Remembering, of course, to sharpen the drill bits first. Had I thought on I might have put a slot in the drill bit tip. This would have avoided so much mild steel spaghetti. I’m also using spray grease as cutting fluid, it works but makes quite a mess.
Welding all the pieces together
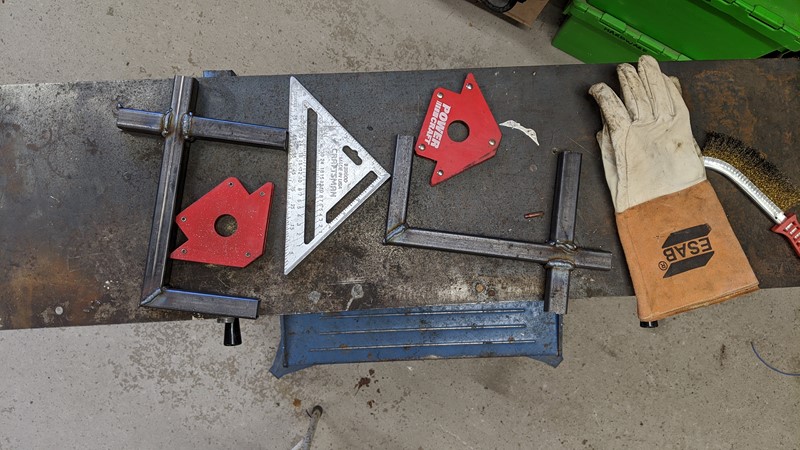
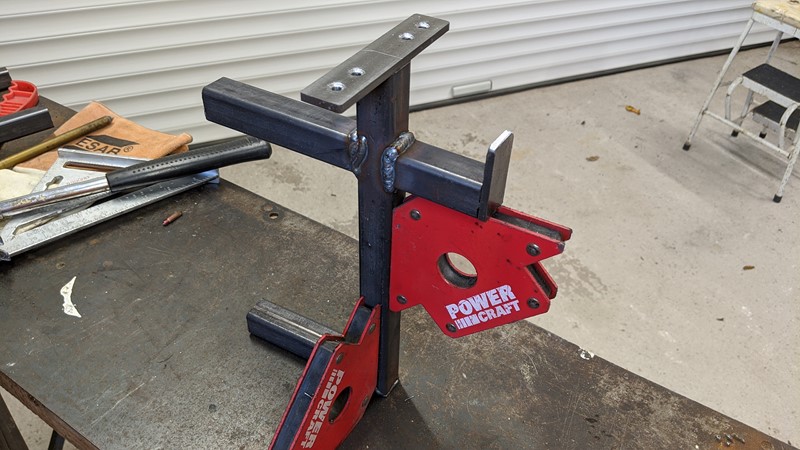
Good accuracy in the cutting and marking really helped with jigging up the pieces. A couple of magnetic corners and a speed square helped get the two brackets square. The long arms are for the storage of the roof bars while the short arm on the back will store a short ladder.
As I was welding the piece together, it became apparent that the fillets in the original design were overkill. The roof rails are relatively light, less than 10kg in total. The bracket would clearly support my weight. The welding was going well until disaster struck!
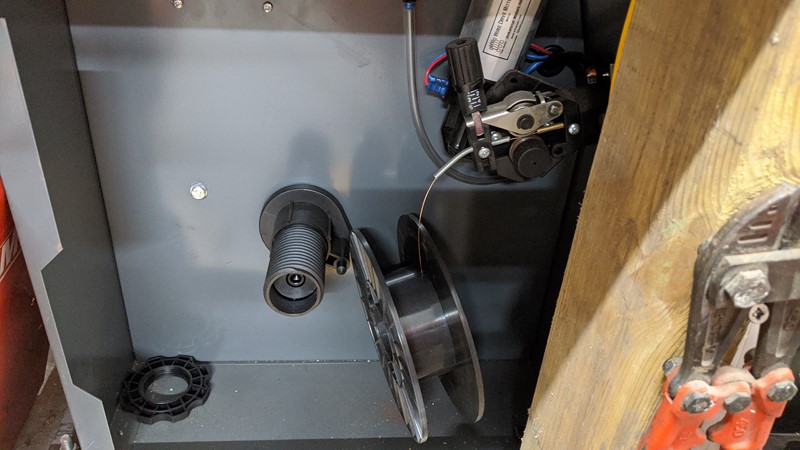
For the first time in my welding history, I ran out of wire. I’ve reached the end of reels before, but I’ve always known I was going to run out and had a new reel ready. Not this time. Doh! Fortunately, my favourite online hobby welding stockist, Weldequip, delivers next day.
For some unknown reason, I ended up ordering 0.6mm wire (and tips) which meant a bit of setting up to do. But in no time at all the rest of the parts of the roof bar storage system were welded together.
The Finished Roof Bar Storage
I’m quite happy with the finished result. It’s always a bonus when the final article looks like the design, and even better when the design works. The two brackets are screwed through the OSB ceiling and into the joist.
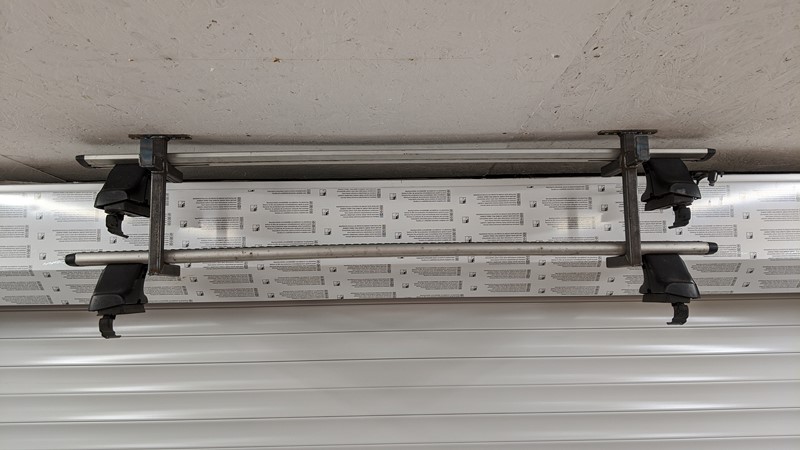
And of course, there was a strength test that needed to be carried out. The brackets can support my weight while doing one-armed pull-ups. Okay, just one pull up, and more like a one-armed dangle, but they are plenty strong!
M