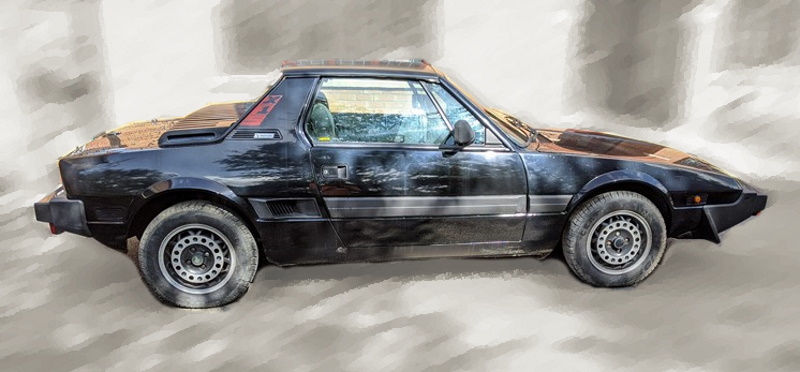
Little did I know when I went to collect the Fiat X1/9 how much I had let myself in for. I certainly didn’t imagine dropping the coolant and removing hoses for a picture of the engine number. Never in a million years did I expect to be replacing brakes and clutch plate to avoid exporting asbestos.
Australia rules on importing asbestos
Quite simply, Australia doesn’t allow the import of asbestos, a very sensible rule. Just one I had no idea about and had never considered. It was only on joining the Australian Fiat X1/9 Facebook Group that a kind member pointed out the pitfalls. A quick call to a local (Australian) importer and they advised that customs expect to see evidence that asbestos-containing materials had been replaced.
The brake pads and clutch are the obvious areas for asbestos-containing material at the point of manufacture, along with a few other potential small items. The brake pads where clearly ‘recent’ to the point of containing no asbestos, but there was every chance the friction plate in the clutch was original. The only way to be certain of the asbestos-free status was quite a lot of hard work.
Replacing the brake pads and discs
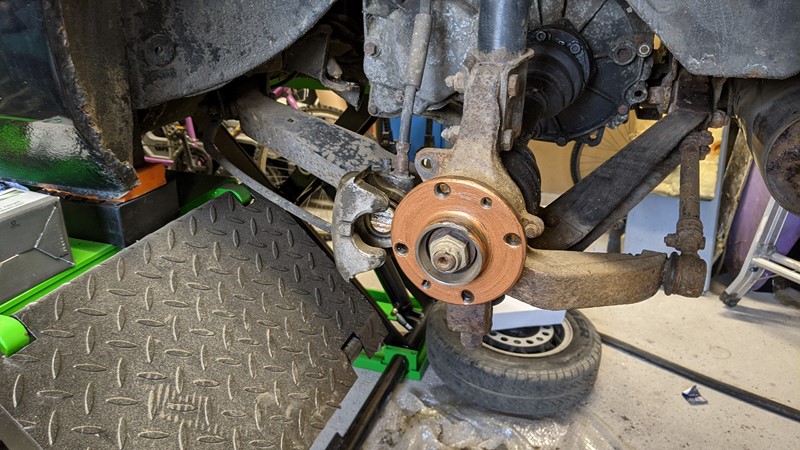
Brakes should be easy enough. Or so I thought. Almost immediately I found an issue with the front nearside caliper. It wasn’t done up!
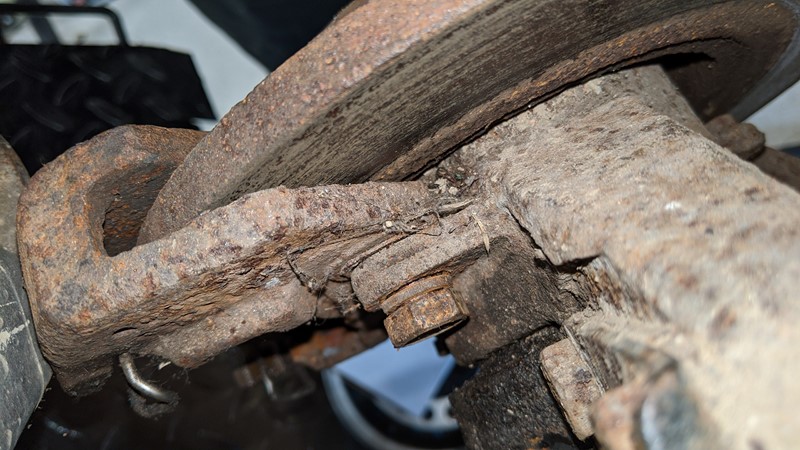
Even in the picture above the bolt is clearly loose and had a good few millimetres of play. At least with a caliper this loose, it should be easy enough to take off. Only a small retraction was needed for the rear calipers thanks to the nearly new pads that were installed. With all the pads removed and calipers out of the way, the discs could be easily removed, or not!
Troublesome cheap brake discs
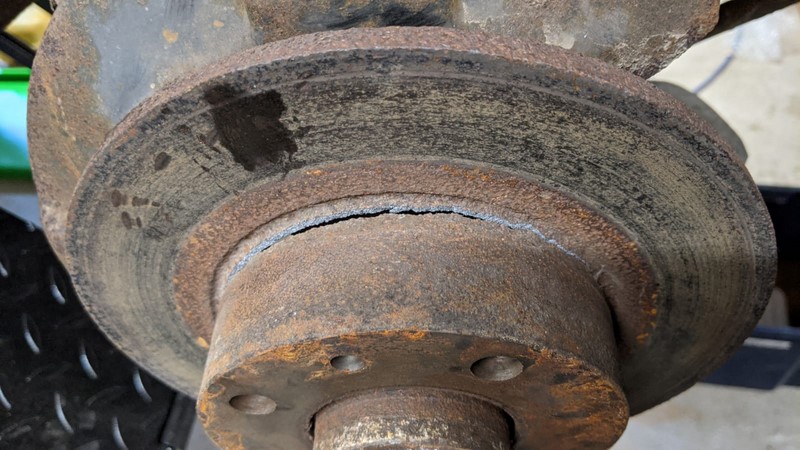
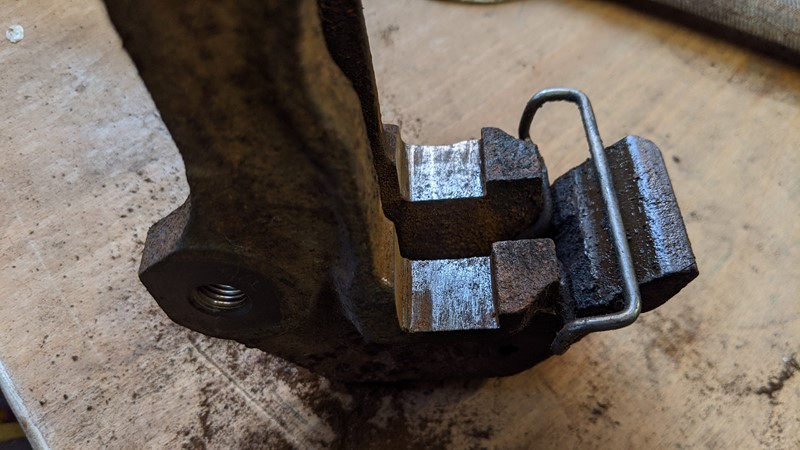
While the rear rotors cam off the hubs easily enough, the same could not be said for the fronts. After much application of fire and beating with a lump hammer, the rotor shattered. I’ve never seen a brake plate separate as it has done in the picture above. This didn’t actually help free off the disc but it did allow the angle grinder to get in.
Fortunately, this is not the first time I’ve had to release something that didn’t want to give in. The approach I take for least damage is to remove enough material that you can expand the stuck bit away from the thing it’s stuck to. In this case, cutting two slots into the disc above the hub, then smashing out material until there is a channel.
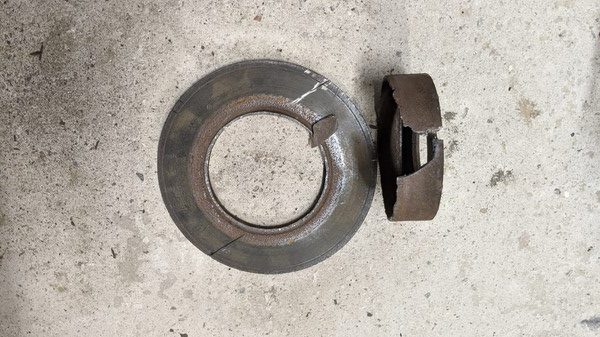
Once a gap is made in the material, a swift tap with a suitable drift frees it from the vicelike grip. Both front discs required the same treatment. Something that was obvious straight away was the difference in weight between the front and rear discs. Quality costs I guess. It actually only took about 30 minutes to get all the discs off, although there was a fatality.
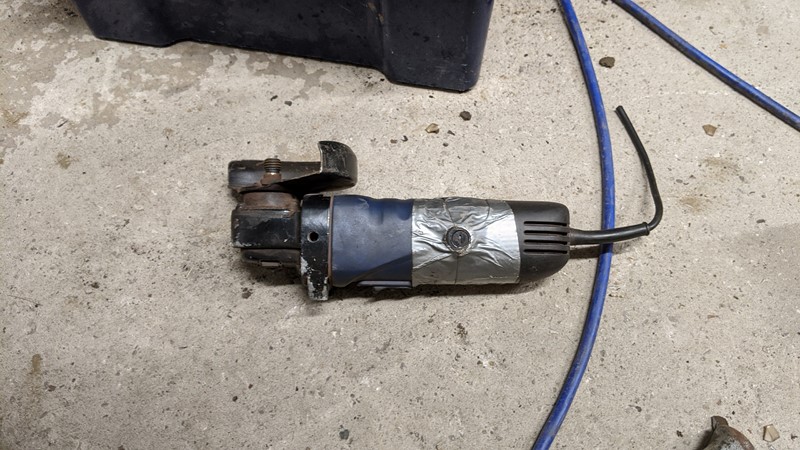
My trusty 20+-year-old angle grinder, that has never been treated well, finally give in. After sterling service, the plastic structure of the motor windings disintegrated throwing white plastic everywhere. I had assumed the disc had failed, but unfortunately, my £25 Aldi angle grinder was no more!
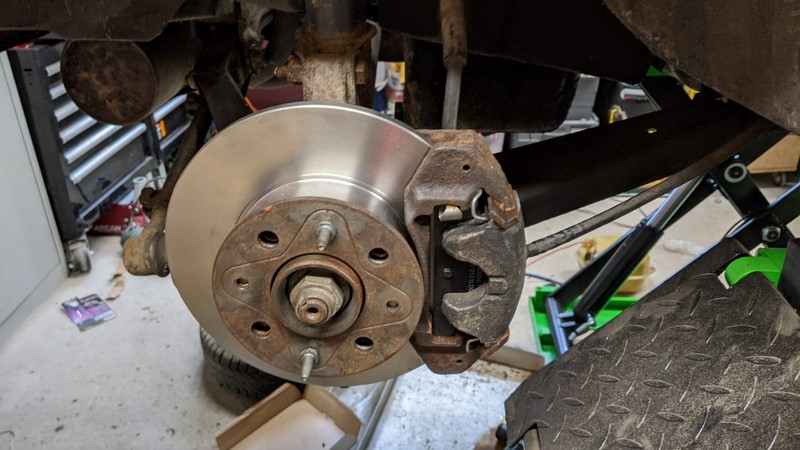
Brakes – In with the new
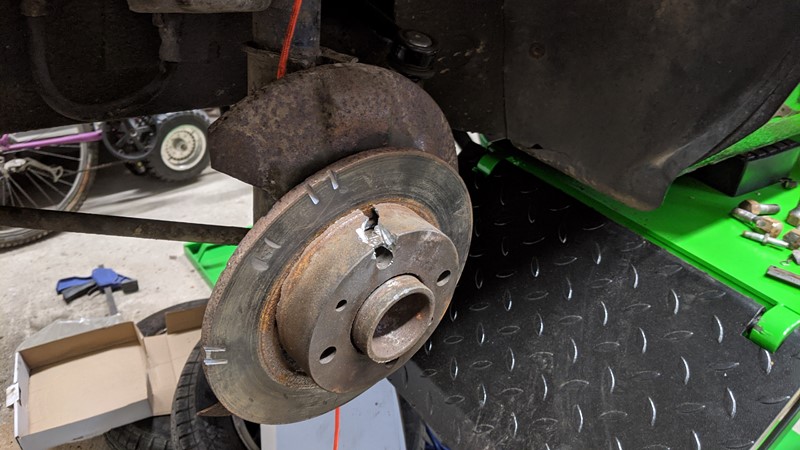
The reason the discs didn’t come off easily at the front was the huge amount of corrosion on the hub. It looks like the brake components were not cleaned when the pads last changed, with no evidence of corrosion prevention. I’m taking no chances with getting the discs off again, so copper slip was applied liberally once the hubs where cleaned.
All of the parts of the caliper that should allow movement were also cleaned and suitably lubricated. In all cases, the brake pad sliding faces where heavily corroded and the machined surface could not be made out. The existing limited lubrication on the calipers as cleaned off and renewed.
And that was stage one complete, in less than 2 hours. The photographic evidence and the receipts for the parts from EurosportUK should allow this asbestos-free box to be ticked!
Removing the gearbox to access the clutch
I have to admit, I was dreading changing the clutch. The very first clutch job I ever did on a car took nearly 3 months! Back then, with few tools and little experience working on cars, a clutch was possibly not the best start point. I did have clutch changes down to a mere 3 hours on the BX at one time, but it’s been a long while.
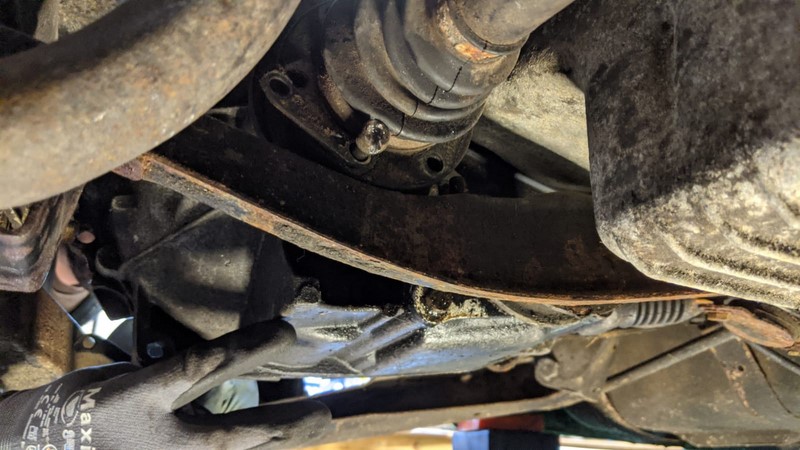
Disconnecting the gearbox on the Fiat X1/9 was pretty straight forward. The clutch slave cylinder needs to be unbolted and tied back out of the way. Disconnect the gear selector linkages. Unbolt the half shafts. Remove gearbox cover plates and bolts from engine to gearbox housing. Through all the work on the car, only this single half shaft bolt caused any problems.
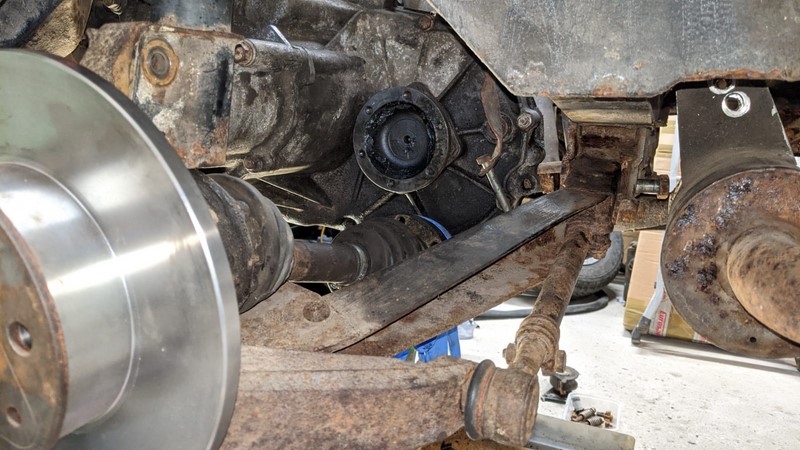
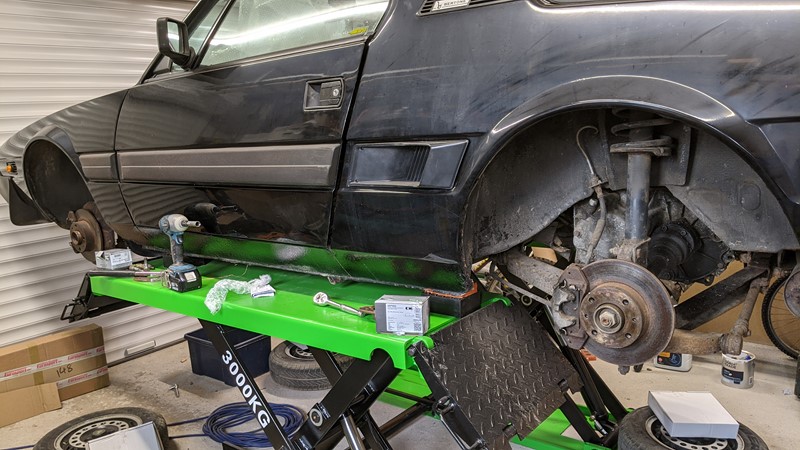
The rear nearside hub was disconnected from the suspension strut and the lower wishbone freed from its tether. This allowed enough space to drop the gearbox down to the ground. The scissor lift made this super easy, allowing quick change from top to bottom access. A decent rope and a bit of a pully system helped to control the gearbox mass. Having a buddy to swing off the rope helped too!
Replacing clutch components
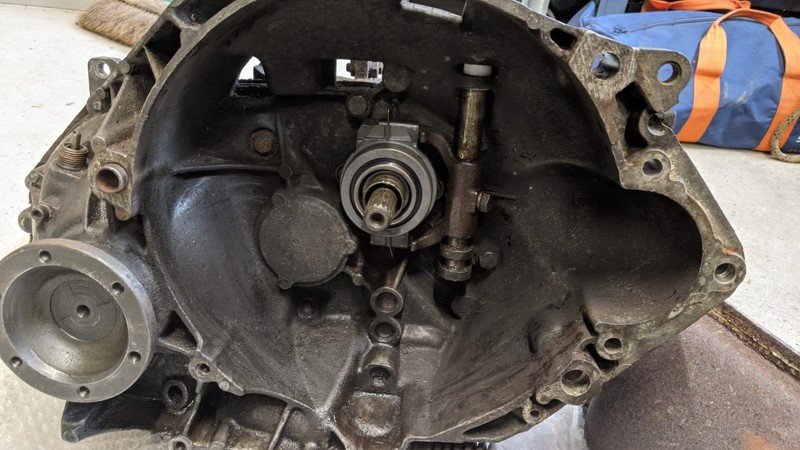
With the gearbox free from the car, some overhauling could begin. To avoid contaminating the new parts, the gearbox housing was lightly cleaned. The clutch throw-out bearing was easy to replace as was the plastic shaft bushing.
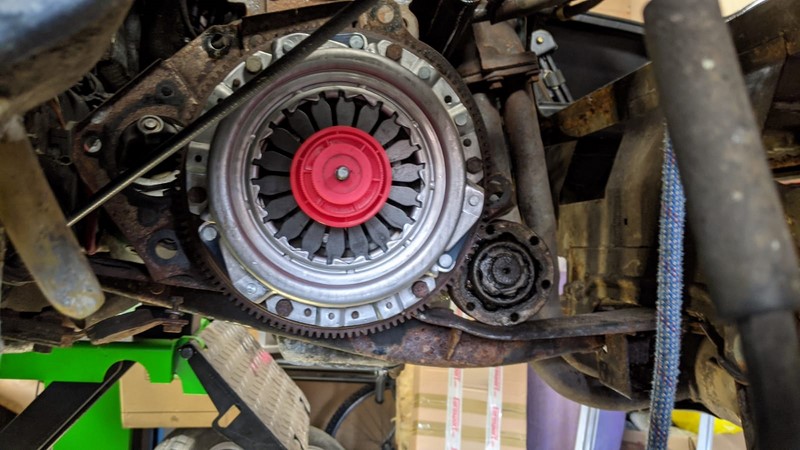
The new clutch was super easy to fit with the universal alignment tool. Despite two decades of ownership, this is the first deployment of this bright pink beast. For Peugeot/Citroen engines I have a precision turned piece of wood, so I’ve never needed the alignment tool before!
Mechanicals complete
After a few more hours of putting parts back onto the car, it happily started and drove out of the garage. All gears where selectable, even reverse. It received an oil change and new coolant with a 50/50 antifreeze mix. Quite a joy to work on, a full-service clutch and brakes completed pretty much in one weekend!
With the mechanical work complete, there are just a few cosmetic tasks to tackle. The car will receive a professional valet before its collected for shipping, so should be in the best shape it has been for years. Hopefully, the Australian customs officials will agree!
M