
Having given the Fiat X1/9 a good wash and removed most of the mud, the paint was looking pretty dull and worn out. The car has clearly spent a lot of time outside, and likely seen as much rain as it has sun. Before shipping to the other side of the world, I wanted to know just how bad the Fiat X1/9 paint was.
Abrasion Vs Treatment
With the lacquer or topcoat slowly turning white, the paint is going to need some serious work to get it to showroom condition. On top of the weathering to the surface, its also covered in light scratches. Some from poor washing technique, some from general wear and tear. To properly remove the scratches, and improve the overall finish, the paint really needs cutting back and polishing.
The cutting process does just that, removes some of the top layer of lacquer. This removes light scratches. Deeper scratches are reduced and polishing creates an even surface that you see your face in. I have a concern that with paint this old it will burn quickly with machine cutting. More importantly, once it gets to its new home, it will need quite a bit of bodywork. So, rather than abrasive cutting process, the bodywork will be treated, with snake oil.
More paint defects
Once I started getting close and personal with the bodywork, I started to notice something. Green flecks of paint all down one side. Initially, I saw one or two, but very quickly I saw more and more!
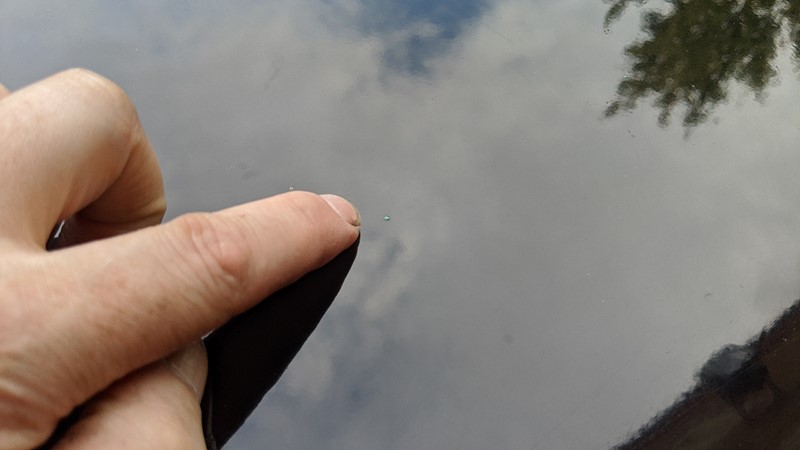
I recall on collecting the car, it was parked next to a building of the same colour. To remove the bigger chunks I soaked a cloth with water and left it on the worst areas overnight. This loosened them up and they could be carefully picked off. Far too many to flecks to do them all though, the new owner is going to be busy!
Miracle Car Cleaning
A quick walk around an auto store or flick through a car cleaning catalogue and you’ll find all manner of wonder treatments for bodywork. Most will claim something fantastical, lasts for 10 years, only takes 2 minutes to apply. In my experience, all the ‘fast’ treatments have the same weaknesses.
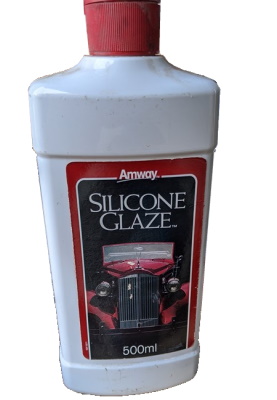
For the Fiat X1/9, I’m going to use this wonder fluid, Silicone Glaze. It’s cheap and runny, relatively easy to apply. And like most miracle cleaning solutions, after the first rain, it will wash away. More so it often leaves a streaky mess. But will it work?
Seeing the true beauty
Well, it may be a miracle fluid, but for now, it’s a huge improvement. This is simply applied with a cloth, allowed to dry and buffed off. I think in this case a picture speaks a thousand words.
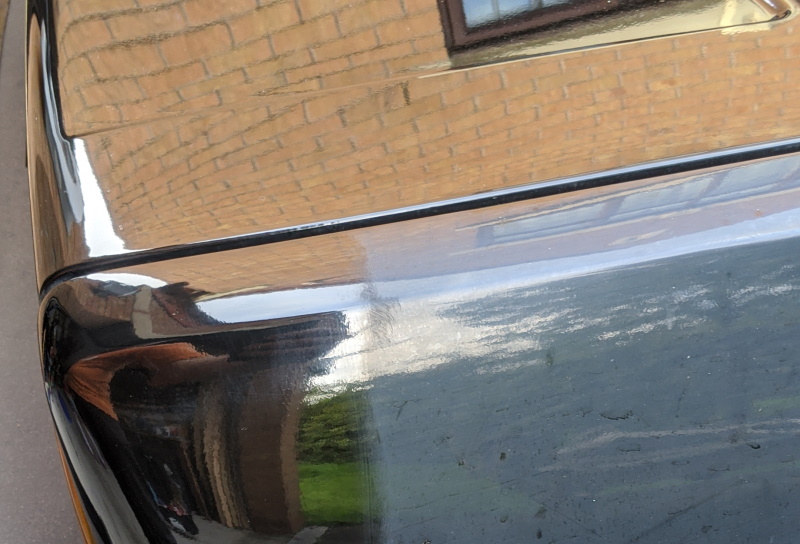
The difference between the original and treated paint really did surprise me. More than anything it suggests the underlying base paint is in pretty good condition and the ageing is restricted to the top coat, hopefully!
Proper cleaning is in the beading
Since I first started cleaning cars with any consideration, there has always been a clear measure of success. Beading.
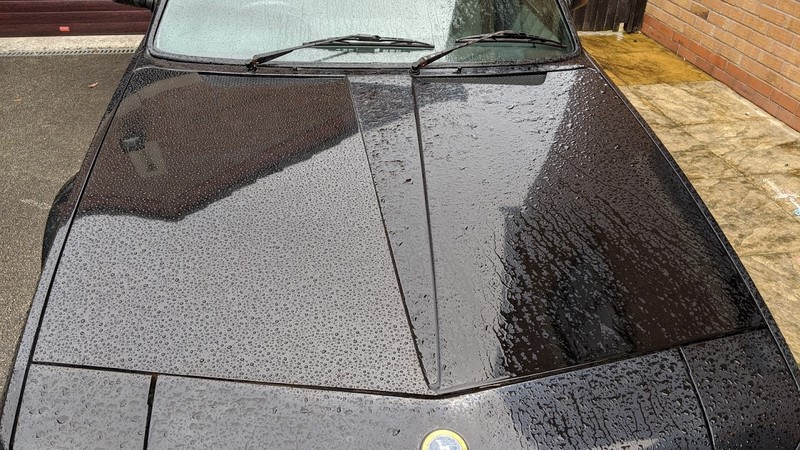
The treated and untreated sides are pretty obvious in the picture. Cleaning bliss! And surprisingly it stayed like this for a good few days!
Whats next?
Having gained some confidence that the paint was worth treating, its time to get the car in the air and check out the rust. This next one could be a long article!
M
NEXT – Fiat X1/9 – Rust Hunt and Treatment
PREV – Fiat X1/9 – First Inspection